Ice plant is a common name applied to several low-growing succulent plants, most notably species within the genera Delosperma, Carpobrotus, and Lampranthus, belonging to the family Aizoaceae. Native primarily to South Africa, these plants have spread widely across warm, dry regions of the world, becoming popular groundcovers in Mediterranean-style and xeriscape gardens. Their ability to thrive in harsh, dry conditions has made them a standout choice for difficult planting sites.
As a plant, ice plant features thick, fleshy leaves that store water, allowing it to survive prolonged drought with ease. The leaves are typically triangular or cylindrical in cross-section, covered with tiny glistening cells that reflect light and give the plant its characteristic sparkling, frosted appearance. This unique leaf texture is responsible for the common name “ice plant,” as the foliage appears dusted with ice crystals in bright sunlight.
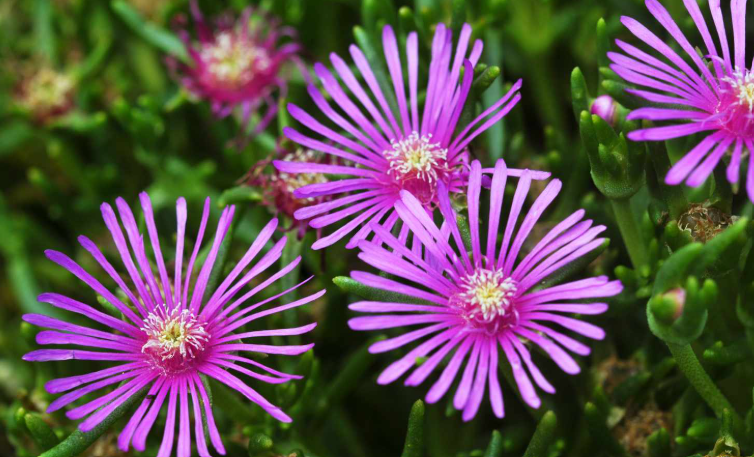
The flowers are among the most vivid and eye-catching of any groundcover plant, appearing in intense shades of magenta, pink, purple, orange, yellow, and white. These daisy-like blooms open fully in direct sunlight and close in shade or overcast conditions, creating a dynamic display throughout the day. In warm climates, flowering can continue for extended periods, sometimes lasting several months.
Ice plants spread quickly across the ground, with most species reaching just 3 to 6 inches (7 to 15 centimeters) in height while spreading several feet wide. This low, dense growth habit makes them exceptionally effective at suppressing weeds and stabilizing slopes prone to erosion. Their mat-forming nature also makes them a practical and attractive alternative to traditional lawn grass in dry climates.
These plants thrive in full sun and well-draining soil, performing best in USDA zones 5 through 11 depending on the species. Delosperma species tend to be the most cold-hardy, with some tolerating temperatures as low as minus 20 degrees Fahrenheit. Carpobrotus and Lampranthus species are better suited to milder, frost-free climates.
Ice plants are widely used in coastal gardens, rock gardens, highway embankments, and fire-resistant landscaping due to their high moisture content and tolerance of challenging conditions. Their salt tolerance also makes them a reliable choice for seaside planting where many other groundcovers struggle. Once established, they require virtually no irrigation in most climates.
Despite their toughness, ice plants can become invasive in some regions, particularly Carpobrotus species along coastal California and parts of Australia, where they outcompete native vegetation. Gardeners in sensitive ecological areas should choose non-invasive species like Delosperma for responsible planting. With the right species selection, ice plants offer outstanding beauty and utility with minimal care.
Also Read: How To Propagate Any Plant From Cutting
How to Propagate Ice Plants From Cuttings
- Select Healthy Stem Cuttings: Choose firm, healthy stems from a vigorous parent plant that show no signs of disease or pest damage. Stems should be mature enough to hold their shape but not woody or overly old. Strong, actively growing stems root most reliably and produce vigorous new plants.
- Take Cuttings in Spring or Early Summer: The best time to take ice plant cuttings is during the active growing season in spring or early summer. Cuttings taken during this period have the highest rooting potential due to increased cellular activity. Avoid taking cuttings during the hottest part of summer or during winter dormancy.
- Cut to the Right Length: Use sharp, clean scissors or pruning shears to take cuttings measuring 3 to 5 inches (7 to 12 centimeters) long. Each cutting should include at least two or three sets of leaves and a clearly visible node. Cutting just below a node gives the best chance of successful rooting.
- Allow Cuttings to Callous Over: Unlike many other plants, ice plant cuttings benefit greatly from being left to dry for one to two days before planting. This drying period allows the cut end to form a protective callous that reduces the risk of rot. Place cuttings in a dry, shaded spot during this time.
- Remove Lower Leaves: Strip away the lower leaves from the bottom inch or two of the cutting to expose the nodes where roots will emerge. Leaves buried in the growing medium can rot quickly and introduce disease. A clean, bare stem section makes planting easier and reduces moisture-related problems.
- Use a Well-Draining Growing Medium: A mix of coarse sand and perlite, or a cactus and succulent potting mix, provides ideal drainage for rooting ice plant cuttings. Regular potting soil retains too much moisture and can cause stem rot. The goal is a medium that holds just enough moisture while allowing excellent aeration.
- Apply Rooting Hormone Optionally: While ice plants often root readily without assistance, dipping the calloused cut end in rooting hormone powder or gel can speed up the process. This is particularly useful when propagating in less-than-ideal conditions. Excess powder should be tapped off before inserting the cutting.
- Insert Cuttings into the Medium: Make a small hole in the growing medium with a pencil or stick before inserting the cutting to avoid disturbing the rooting hormone. Firm the medium gently around the base of the cutting to ensure good contact. One cutting per small pot allows for easier monitoring and transplanting later.
- Water Lightly After Planting: Give cuttings a light watering immediately after planting to settle the medium around the stem. Subsequent watering should be minimal, as ice plants are highly susceptible to rot if kept too moist. Allow the medium to dry almost completely between waterings.
- Place in a Warm, Bright Location: Cuttings root best in a warm spot with bright, indirect light rather than direct intense sun. A sunny windowsill or a sheltered outdoor spot with filtered light works well. Too much direct sun during rooting can cause the cuttings to dry out before roots form.
- Avoid Covering with Humidity Domes: Unlike many other cuttings, ice plants do not benefit from high humidity enclosures during rooting. Their succulent nature means excess moisture around the foliage increases rot risk rather than aiding establishment. Good air circulation around cuttings is preferable.
- Monitor for Root Development: After two to four weeks, gently tug the cutting to check for resistance indicating root formation. Small roots may also become visible at the drainage holes of the container. Avoid checking too frequently, as repeated disturbance can disrupt the rooting process.
- Transplant Once Roots Are Established: Once a healthy root system has developed, cuttings can be moved into slightly larger pots or directly into garden beds. Handle roots carefully during transplanting to avoid damage. Water gently after transplanting and provide some shade for the first few days.
- Gradually Introduce to Full Sun: Newly rooted cuttings should be introduced to full sun exposure gradually over one to two weeks. Starting with morning sun and increasing exposure daily helps prevent sunscorch on tender new growth. Once fully hardened, ice plants thrive in the most intense sun available.
- Plant in Well-Draining Garden Beds: When transplanting to the garden, ensure the chosen site has excellent drainage and receives full sun for most of the day. Raised beds, slopes, and rocky areas are ideal planting sites. Avoid low-lying areas where water might pool after rain.
- Water Sparingly After Establishment: Once established in the garden, ice plants need very little supplemental watering and should be treated much like other succulents. Overwatering is the most common cause of failure in established plants. In most climates, natural rainfall provides sufficient moisture once the root system is fully developed.
Also Read: How to Grow Snowdrops From Bulbs