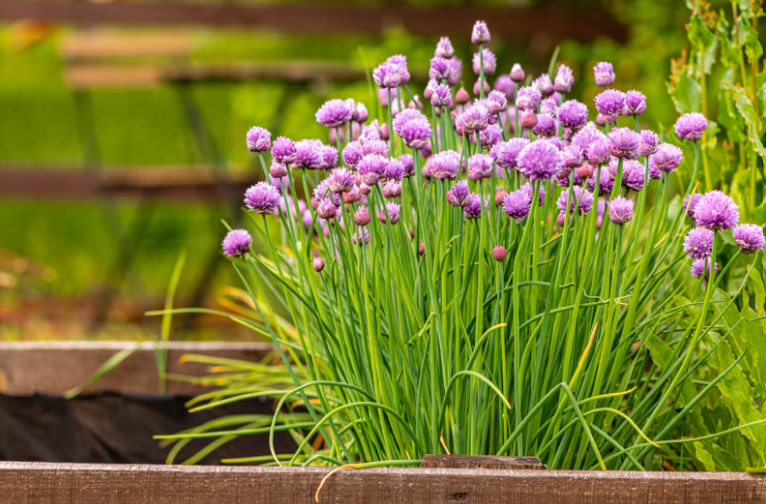
Chives are genuinely one of the easiest herbs a home gardener can grow, tolerant of a wide range of conditions, largely pest-resistant, and productive for years from a single planting with only minimal ongoing care. Most of the real decisions involved in growing chives well come down to a handful of early choices, how you start the plant, where you put it, and how you manage it once it’s established, rather than any demanding or technical requirement.
This guide covers everything involved in growing and caring for chives: choosing a planting method, light, soil, watering, fertilizing, spacing, dividing established clumps, deadheading, harvesting, preserving the harvest, winter care, pests and diseases, and companion planting.
Choosing a Planting Method
Chives can be started from seed, from nursery transplants, or from root divisions taken from an already-established clump, and each method has genuine advantages. Starting from seed is the least expensive option and works well, though it takes longer to reach a harvestable size, generally requiring germination at a temperature between about 60 and 70 degrees Fahrenheit and consistently moist soil until seedlings emerge.
Buying a small nursery transplant gives you a considerable head start, since you’re skipping the germination and early seedling stage entirely. Dividing an existing clump, whether your own or one shared by a friend or neighbor, is the fastest way to establish a new planting that’s already true to a specific cultivar, since seed-grown chives can show some variation while a division is genetically identical to its parent plant.
Also Read: Different Types of Chives Varieties
Planting and Spacing
Plant chives in spring after the danger of frost has passed, or in early fall in a milder climate where the plant will have time to establish before winter. Dig a hole roughly the same depth as the container the plant is currently growing in, and set transplants or divisions about 6 to 8 inches apart to give each clump room to fill out without immediately crowding its neighbors.
If you’re direct-sowing seed outdoors, scatter seeds thinly and cover them with just a light dusting of soil, since chive seeds need some light exposure to germinate reliably. Thin seedlings once they’re a few inches tall if they’ve come up too densely, giving the strongest seedlings room to develop into full clumps rather than competing for space and nutrients.
Light Requirements
Chives perform best in full sun, generally described as 6 or more hours of direct light daily, though they also tolerate partial shade reasonably well. In a hot climate, a bit of afternoon shade can actually help the plant stay more vigorous through the hottest part of summer, but in most temperate regions, the sunniest available spot will produce the strongest, most flavorful growth.
A plant grown in too much shade will still survive, but expect thinner, less vigorous foliage and a noticeably reduced flower display compared to a chive clump given full sun. If you’re choosing a planting location, prioritize sun exposure over nearly every other site consideration.
Soil Requirements
Average, well-drained garden soil is perfectly adequate for chives, and this is genuinely not a demanding plant when it comes to soil fertility or composition. That said, working some compost or other organic matter into the planting area before setting out transplants or sowing seed will give young plants a stronger start and support more vigorous early growth.
Good drainage matters more than fertility, since chives, like most members of the onion family, dislike sitting in consistently soggy, waterlogged soil. If your garden has heavy clay that drains slowly, raised beds or the addition of coarse organic matter will help prevent the kind of excess moisture that encourages root disease.
Watering
Chives have moderate water needs, and the general rule is to keep the soil consistently and evenly moist, particularly while plants are young and establishing their root systems. Once established, a mature clump shows real drought tolerance and can handle a dry spell without serious harm, though consistent moisture will keep the foliage more tender and better flavored than a plant left to dry out repeatedly.
Avoid overwatering just as much as underwatering, since waterlogged soil is one of the more common ways to encourage root rot in an otherwise tough, easy-care plant. A deep watering once or twice a week during active growth, adjusted up during hot, dry stretches and down during cool or rainy periods, is a reasonable general approach for most gardens.
Fertilizing
Chives are not heavy feeders, and many gardeners skip supplemental fertilizer entirely without any noticeable decline in plant health. If you do want to feed your plants, a balanced fertilizer, something like a 5-10-5 formulation, applied once in spring as new growth begins, is generally sufficient to support a full season of vigorous growth.
Avoid heavy or frequent fertilizing, since excessive nitrogen in particular tends to push soft, lush leaf growth that can be more prone to disease and, by most accounts, somewhat less flavorful than a plant grown without rich feeding. A light touch with fertilizer is almost always the better approach for this particular herb.
Dividing Established Clumps
Chive clumps should be divided roughly every 2 to 3 years to prevent overcrowding, which otherwise reduces air circulation through the center of the clump and increases the risk of fungal disease and root problems. Division also happens to be the simplest, most reliable way to propagate new plants that are genetically identical to the parent.
The best times to divide are early spring, just as new growth is emerging, or fall, after the heat of summer has passed. Dig up the entire clump, gently separate it into smaller sections using your hands or a sharp knife, making sure each division retains a healthy portion of roots, and replant the sections promptly at the same depth they were growing previously, watering thoroughly right after replanting.
Deadheading and Preventing Self-Seeding
Chives flower readily in late spring or summer, producing attractive, edible, pom-pom-like blooms that pollinators genuinely appreciate. Left alone, though, spent flower heads will produce viable seed that drops and germinates freely around the original plant, and an unmanaged clump can spread considerably more aggressively through self-seeding than many gardeners expect or want.
If you’d rather keep your chive planting contained to its original spot, snip off flower heads as they fade, before they have a chance to set and drop seed. If you don’t mind a bit of natural spread, or you’re specifically trying to establish chives more broadly in an informal herb garden, letting some flowers go to seed is a perfectly reasonable choice, just be aware of what you’re signing up for.
Harvesting
Chives can be harvested lightly starting the first season after planting, though it’s generally best to let a newly planted clump establish for several weeks before the first significant harvest. Use scissors or a sharp knife to snip leaves down to about 2 inches above the soil line, rather than pulling or tearing individual leaves, which can damage the plant and slow regrowth.
Regular harvesting actually benefits the plant, encouraging fresh new growth rather than letting older leaves toughen or yellow. During the height of the growing season, a single healthy clump can be harvested every couple of weeks without any noticeable strain on the plant, making chives one of the more genuinely renewable herbs in a typical kitchen garden.
Preserving the Harvest
Fresh chives are best used soon after cutting, since their delicate flavor fades noticeably faster than many other herbs once harvested. If you have more than you can use fresh, freezing chopped chives is generally a more effective preservation method than drying, since the freezing process better protects the volatile oils responsible for the plant’s characteristic flavor.
To freeze chives, chop them finely and either pack them loosely into a freezer bag or freeze them in ice cube trays with a small amount of water or oil, which makes it easy to pull out pre-portioned amounts later. Dried chives are an option too, but expect a considerably milder, less vibrant flavor compared to fresh or frozen.
Winter Care
Chives die back to the ground in winter in most climates and reliably resprout from the dormant underground bulb once the weather warms in spring. In regions with particularly harsh winters, cutting the foliage back to ground level in late fall, after it’s died back naturally, and applying a light layer of mulch over the dormant clump offers some extra insurance against the most severe cold.
In milder climates, chives may stay evergreen or nearly so through winter, continuing to provide at least some harvestable leaves even in the cooler months. Container-grown chives can also be brought indoors to a sunny windowsill for winter, giving you fresh chives through the colder months when the garden itself has gone dormant.
Growing in Containers
Chives adapt well to container growing, making them a practical choice for a patio, balcony, or kitchen windowsill where an in-ground garden bed isn’t available. Choose a pot at least 6 to 8 inches deep with good drainage holes, fill it with a quality potting mix, and treat the plant much as you would an in-ground specimen, with full sun, consistent moisture, and an occasional light feeding.
Container-grown chives do need slightly more attention to watering than their in-ground counterparts, since potting soil dries out faster than garden soil, particularly in a small container during hot weather. Dividing a container-grown clump every couple of years is just as important as it is in the ground, both to keep the plant healthy and to prevent it from outgrowing its pot entirely.
Pests and Diseases
Chives are a genuinely pest-resistant herb, and their own pungent aroma is part of why they’re often planted specifically to help deter pests from nearby plants. That said, they’re not entirely immune, and onion thrips, onion maggots, aphids, and occasionally fungus gnats can show up under the right conditions.
Fungal diseases, including downy mildew, Botrytis leaf blight, and root rot, are the more likely source of real trouble, and nearly all of them trace back to excess moisture or poor air circulation rather than any inherent weakness in the plant. Keeping clumps properly spaced and divided, watering at the base rather than overhead, and promptly removing any yellowed or diseased foliage will prevent the great majority of problems before they start.
Companion Planting
Chives have a long history as a companion plant, valued for their ability to help repel aphids and other common garden pests from nearby plantings. Good companions for chives include tomatoes, carrots, roses, and strawberries, along with other aromatic herbs like dill, parsley, and marjoram, all of which tend to benefit from or at least coexist well with chives’ pest-deterrent reputation.
Avoid planting chives too close to beans or peas, since members of the onion family and legumes tend to compete for similar soil resources rather than growing well together. Beyond pest deterrence, chives’ attractive foliage and flowers make them a genuinely pleasant addition to a mixed ornamental and edible border, serving double duty as both a practical companion plant and a decorative one.
Key Takeaways
- Chives are hardy perennial herbs that are relatively easy to grow in gardens, raised beds, and containers.
- Plant chives in a location receiving full sun to partial shade, with more afternoon shade helpful in very hot climates.
- Use fertile, well-drained soil that retains some moisture without becoming waterlogged.
- Keep the soil evenly moist, particularly while plants are becoming established, but avoid excessive watering.
- Feed chives occasionally with a balanced fertilizer or compost to support healthy leaf production.
- Harvest the leaves regularly by cutting them a few inches above the soil, which encourages fresh, tender growth.
- Remove spent flowers if you want to focus the plant’s energy on leaf production, or allow some flowers to remain to attract pollinators.
- Divide crowded chive clumps every few years to rejuvenate older plants and create new plants.
- Chives can be propagated from seed or division, with division often being the quickest way to establish mature clumps.
- With adequate sunlight, moisture, fertile soil, and regular harvesting, chives can provide fresh leaves throughout much of the growing season.