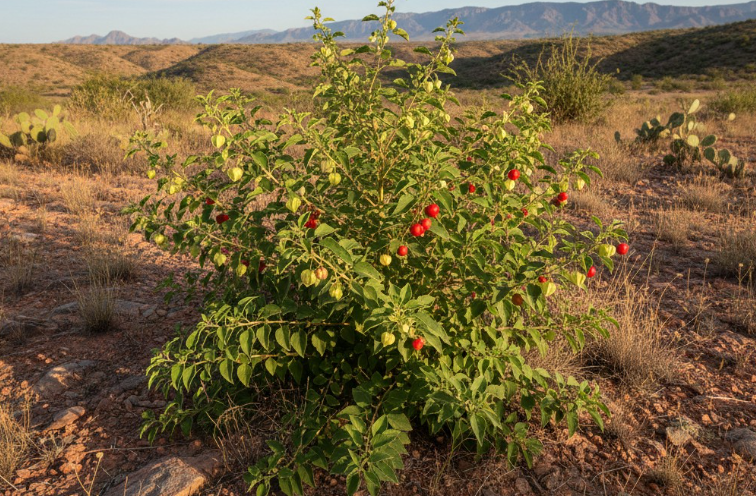
Ashwagandha is one of the more forgiving medicinal herbs a home gardener can grow, especially compared to a genuinely demanding crop like wasabi. Native to the dry, stony ground of India, the Middle East, and North Africa, it’s built for neglect rather than pampering, and most of the mistakes gardeners make with it come from overwatering or over-fertilizing a plant that actually prefers lean, sun-baked conditions.
This guide covers everything involved in growing and caring for ashwagandha: starting it from seed, light, water, soil, temperature, feeding, pests and diseases, harvesting the root, and an important safety note about the plant’s berries.
Starting From Seed
Ashwagandha is most commonly grown from seed, and seeds generally germinate within 1 to 2 weeks under warm conditions. In a cooler climate, start seeds indoors 6 to 8 weeks before your last expected frost date, then transplant seedlings outdoors once the weather has reliably warmed.
In a warm, frost-free climate, seeds can be direct-sown straight into the garden once the soil has warmed in spring. Space plants roughly 2 to 3 feet apart, since a mature plant develops a genuinely bushy, sprawling habit that needs real room to spread.
Light Requirements
Ashwagandha wants full sun, and plenty of it. This is a plant adapted to open, sun-exposed, semi-arid growing conditions, and it performs best with at least 6 hours of direct sun a day.
It will tolerate partial shade, but expect a noticeably less vigorous plant with reduced flowering and root development if it doesn’t get enough direct light. If you’re choosing between a sunnier spot with poorer soil and a shadier spot with richer soil, the sunnier location is almost always the better choice for this particular plant.
Also Read: Different Types of Ashwagandha Plants
Watering
Ashwagandha is genuinely drought tolerant once established, and overwatering is a far bigger risk to the plant’s health than underwatering. Water regularly while seedlings are young and establishing their root systems, then taper off significantly as the plant matures.
A mature plant generally only needs supplemental water during an extended dry spell, and allowing the soil to dry out between waterings is exactly what this plant wants. Consistently soggy or waterlogged soil is one of the most common ways to damage or kill an otherwise healthy ashwagandha plant.
Soil Requirements
Lean, well-drained soil is ideal, and ashwagandha genuinely performs better in poor, sandy, or loamy ground than in rich, heavily amended garden soil. If your native soil is heavy clay, working in coarse sand or fine gravel before planting will meaningfully improve drainage and give the plant a much better chance.
Soil pH isn’t a major concern for this plant, since it tolerates a fairly wide range without issue. The priority is drainage above all else, since waterlogged roots are a far more serious threat to the plant than any particular pH or fertility level.
Temperature Considerations
Ashwagandha thrives in warm to hot conditions and has little tolerance for frost, which is why it’s grown as a perennial only in genuinely warm, frost-free climates and treated as a warm-season annual everywhere else. In a temperate climate, expect to replant from seed each year rather than relying on the same plant to return.
If an unexpected cold snap threatens young plants, a frost cloth or similar temporary cover can help, but a hard freeze will generally kill the plant outright. Gardeners in a marginal climate are often better off simply treating ashwagandha as an annual crop from the start rather than trying to overwinter it.
Feeding
Ashwagandha doesn’t need rich soil or heavy fertilizing to perform well, and in fact the opposite is closer to the truth. This is a plant adapted to genuinely lean, nutrient-poor growing conditions in the wild, and overfeeding it tends to push excessive leafy growth at the expense of the root development most growers are actually after.
A light application of balanced fertilizer at planting time is generally sufficient, and additional feeding beyond that is rarely necessary for a healthy plant growing in reasonably well-drained soil.
Pests and Diseases
Ashwagandha is a fairly tough, low-maintenance plant overall, but it isn’t entirely immune to problems. Root rot is the most serious risk, and it’s almost always a direct result of soil that stays too wet for too long rather than any inherent weakness in the plant itself.
Aphids and spider mites can occasionally show up, particularly on stressed or crowded plants, and a leaf spot disease has also been documented affecting the foliage in some growing regions. Good air circulation between plants, achieved simply by spacing them properly at planting time, goes a long way toward preventing most of these issues before they start.
Harvesting the Root
The root is the part of the plant most commonly used, and harvesting it requires patience: plants are typically ready for root harvest somewhere around 150 to 180 days after sowing, generally once the foliage has begun to die back and the berries have ripened to their mature orange-red color. At that point, the plant’s energy has shifted fully into the root, which is exactly when it’s ready to dig.
Carefully loosen the soil around the base of the plant before lifting the root to avoid breaking it, since the root’s full length is part of what’s valued. Once harvested, roots are typically washed, cut into smaller pieces, and dried thoroughly before storage or further use.
A Safety Note on the Berries
Ashwagandha belongs to the nightshade family, and its berries are considered poisonous, so they should never be eaten regardless of how appealing the ripe orange-red color looks. If you’re growing this plant anywhere children or pets have access to the garden, it’s worth keeping that risk in mind and considering the plant’s placement accordingly.
Handling the plant itself for routine gardening tasks, like weeding, watering, or harvesting the root, poses no particular concern, but treat the fruit specifically as something to admire visually rather than sample.