Nerve Plant [Fittonia albivenis] is a compact, low-growing tropical perennial native to the rainforests of South America, particularly Peru and Colombia. It belongs to the Acanthaceae family and is widely cultivated as a houseplant for its striking, highly decorative foliage. The plant rarely exceeds 6 inches in height, forming a dense, spreading mat of lush leaves that makes it ideal for terrariums, hanging baskets, and indoor garden displays.
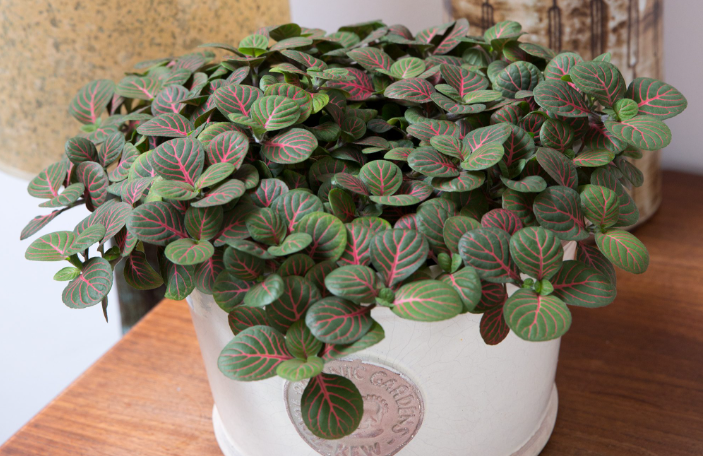
The most defining feature of the nerve plant is its ornate leaf patterning. The oval-shaped leaves are covered in an intricate network of contrasting veins that resemble a nervous system, giving the plant its common name. Vein colors range from white and silver to deep pink, red, and green, depending on the cultivar. Leaf sizes typically measure 1 to 4 inches long, and the overall effect is a mosaic of color that few houseplants can rival.
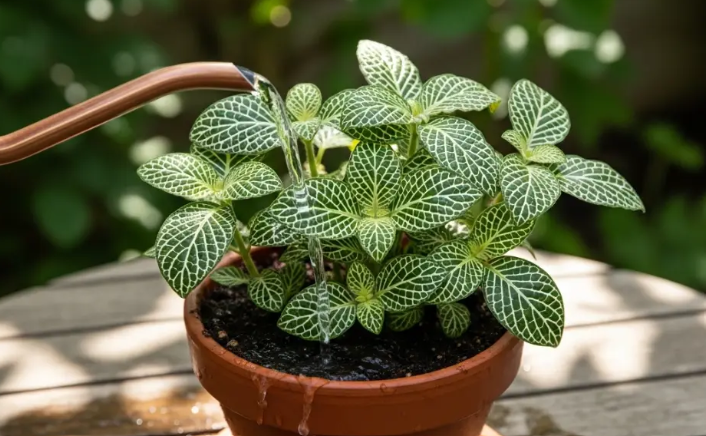
Nerve plant thrives in warm, humid environments that mimic its native rainforest habitat. It performs best in temperatures between 60°F and 80°F (16°C to 27°C) and requires consistently high humidity, ideally above 50%. It is sensitive to cold drafts, dry air, and direct sunlight, making indoor cultivation in controlled environments far more successful than outdoor growing in most climates.
Despite its exotic appearance, the nerve plant is not a heavy feeder or aggressive grower. It prefers indirect or filtered light, moist but well-draining soil, and moderate watering to prevent root rot. It is commonly grown in terrariums because the enclosed environment maintains the humidity levels it craves. It is also a popular choice for fairy gardens and mixed tropical indoor arrangements.
The nerve plant produces small, inconspicuous flowers on upright spikes, though blooming indoors is relatively rare. Many growers pinch off flower buds when they appear to redirect the plant’s energy into maintaining its vibrant foliage. The flowers themselves are not particularly ornamental, so the plant’s primary appeal remains firmly rooted in its decorative leaves throughout the year.
Several popular cultivars have been developed from the base species, offering gardeners a wide palette of vein colors and leaf sizes. Notable varieties include ‘Frankie’ with soft pink veins, ‘White Anne’ with silvery-white veining, ‘Red Anne’ featuring bold red markings, and ‘Skeleton’ with dramatic contrasting patterns. Miniature varieties have also gained popularity for terrarium planting, and ongoing hybridization continues to expand the range of available leaf colorations and growth habits.
Also Read: Different Types of Fittonia (Nerve Plants)
How To Grow Nerve Plant From Seed
- Understand that growing nerve plant from seed is considered challenging compared to vegetative propagation, as commercially available seeds are relatively rare and germination can be inconsistent. Most growers source seeds from specialty tropical plant suppliers or harvest them from mature specimens after flowering.
- Obtain fresh seeds whenever possible, as nerve plant seeds lose viability quickly after harvest. Seeds older than a few months have significantly reduced germination rates, so purchasing from reputable suppliers who guarantee freshness is essential for success.
- Prepare a seed-starting mix that is light, well-draining, and moisture-retentive. A blend of peat moss or coco coir with perlite in a 2:1 ratio works well, as it holds enough moisture for germination while preventing waterlogging that can cause seed rot.
- Fill shallow seed trays or small pots with the prepared mix and lightly moisten it before sowing. The growing medium should feel damp but not soggy, and water should drain freely from the bottom of the tray to ensure air reaches the seeds during germination.
- Sow the seeds on the surface of the growing medium without burying them, as nerve plant seeds require light for germination. Gently press them against the surface to ensure good contact with the moist soil, but do not cover them with additional growing mix.
- Mist the surface lightly with a spray bottle after sowing to settle the seeds without displacing them. A fine mist is preferable to pouring water, which can wash tiny seeds to the edges of the tray and result in uneven germination.
- Cover the seed tray with a clear plastic dome or wrap it loosely in transparent plastic to create a humid microclimate. Nerve plant seeds require humidity levels above 70% during germination, and enclosing the tray prevents moisture from evaporating too quickly from the surface.
- Place the covered tray in a warm location where temperatures remain consistently between 70°F and 80°F (21°C to 27°C). A heat mat set to the appropriate temperature placed beneath the tray can significantly improve germination speed and uniformity.
- Position the seed tray under bright indirect light or under grow lights for 12 to 14 hours daily. Avoid direct sunlight, which can overheat the enclosed tray and damage delicate emerging seedlings before they have established any protective root system.
- Check the tray daily to monitor moisture levels and watch for signs of mold or fungal growth, which can develop quickly in the warm, humid environment. If mold appears, increase ventilation briefly each day by lifting the plastic cover for 15 to 20 minutes to allow fresh air circulation without significantly reducing humidity.
- Germination typically occurs within 14 to 30 days under optimal conditions, though timing can vary depending on seed freshness and temperature consistency. Do not discard the tray if no sprouting is visible within the first two weeks, as some seeds may germinate later than others.
- Once seedlings emerge and develop their first set of true leaves, begin gradually increasing ventilation by propping the plastic cover open slightly each day. This hardening process acclimates the seedlings to normal ambient humidity levels and reduces the risk of transplant shock.
- When seedlings reach approximately 1 to 2 inches in height and have developed two to three sets of true leaves, they are ready for transplanting into individual small pots. Use a well-draining tropical houseplant mix combined with perlite, and handle the fragile roots with great care during the transfer process.
- After transplanting, place seedlings in a spot with bright indirect light and maintain temperatures above 60°F (16°C) at all times. Continue misting around the plants regularly or place them on a humidity tray filled with pebbles and water to maintain the elevated moisture levels young nerve plants need during establishment.
- Feed transplanted seedlings with a diluted balanced liquid fertilizer at quarter strength once every four weeks during the growing season, beginning about six weeks after transplanting. Avoid heavy feeding in the early stages, as young nerve plant roots are sensitive to fertilizer burn and excess nutrients can cause leaf yellowing and stunted growth.