A Practical Guide to Tall, Healthy Blooms
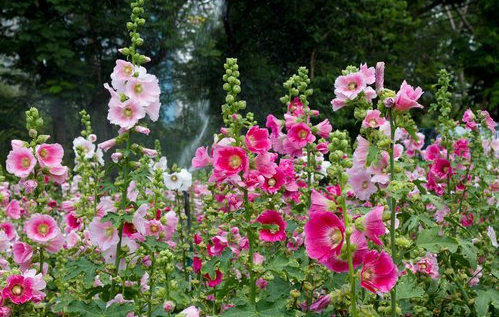
Hollyhocks are not subtle flowers.
When they are happy, they can send tall flowering stalks several feet into the air, turning an otherwise ordinary garden border into a vertical wall of color. Their large, open flowers appear along the stems one after another, creating a display that can last for weeks.
But that impressive height is also one of the reasons hollyhocks sometimes struggle.
A plant that grows several feet tall has different needs from a compact bedding flower. It needs enough sunlight to build strong stems, enough space for air to circulate, sufficient moisture while establishing, and sometimes a little support when summer winds arrive.
Hollyhocks are also plants that benefit from understanding their life cycle. Some are biennial, while others behave as short-lived perennials depending on the variety and growing conditions.
The good news is that once established, hollyhocks are not particularly demanding.
The key is to get the planting location, soil, moisture, and airflow right from the beginning.
This guide explains how to grow and care for hollyhocks successfully, including how to start them from seed, encourage flowering, prevent common problems, and keep them returning to the garden.
What Are Hollyhocks?
Hollyhocks belong primarily to the genus Alcea and are members of the mallow family.
They are best known for their tall flower spikes and large, funnel-shaped blooms.
Flowers can occur in a wide range of colors, including:
- Pink
- Red
- White
- Yellow
- Purple
- Burgundy
- Peach
- Almost black
Some varieties have simple flowers, while others have semi-double or double blooms.
Their upright growth makes them particularly useful along fences, walls, the backs of flower borders, and other locations where a tall vertical accent is desirable.
Hollyhocks are also attractive to pollinating insects, making them useful in gardens designed to support bees and other flower visitors.
One important thing to understand is that hollyhocks are not necessarily short-lived because they are poorly cared for.
Many varieties naturally have a relatively short life cycle.
Some produce foliage during the first season, flower during the second, and then decline after producing seed. Others may persist for several years under favorable conditions.
Understanding this prevents disappointment when a plant behaves differently from a typical long-lived perennial.
Choose the Right Location
The planting location can determine whether a hollyhock becomes a magnificent flowering tower or a weak, disease-prone plant.
Hollyhocks generally perform best in full sun.
Aim for at least six hours of direct sunlight each day.
More sunlight is often beneficial, particularly in climates where humidity and rainfall can encourage fungal problems.
A sunny position also helps stems develop stronger growth.
Avoid planting hollyhocks in deep shade.
A plant receiving insufficient light may become tall and weak without producing the number of flowers you expected.
Because hollyhocks naturally become tall, don’t judge a location only by the amount of sunlight it receives at ground level.
Look upward.
A nearby tree that is small today may eventually shade the plants.
Also Read: Different Types of Hollyhock Flowers You Can Grow
Think About Wind Before Planting
A hollyhock can become surprisingly tall.
That means wind exposure matters.
A location beside a fence or wall can provide useful protection from strong winds while still allowing sufficient sunlight.
However, don’t plant the flowers directly against a damp wall or in an area where air becomes trapped.
The ideal position provides both support and airflow.
If your garden is exposed to strong winds, consider growing shorter varieties or installing support before plants reach their full height.
A stake placed beside a mature, leaning hollyhock is less effective than support installed early.
Prepare Well-Drained Soil
Hollyhocks prefer fertile soil that drains reasonably well.
They appreciate organic matter, particularly when growing in sandy or poor soil.
Compost can improve soil structure and provide a gradual source of nutrients.
However, drainage is important.
Soil that stays saturated for long periods can weaken roots and increase the risk of disease.
If your garden contains heavy clay, consider improving drainage or growing hollyhocks in raised beds.
At the same time, don’t create extremely dry conditions.
The ideal soil retains enough moisture to support growth while allowing excess water to escape.
Start Hollyhocks From Seed
Hollyhocks are often grown from seed, and this is one of the easiest ways to establish several plants at relatively low cost.
The seeds are relatively large compared with some flower seeds and are generally easy to handle.
You can sow them directly in the garden or start them in containers.
Direct sowing has an advantage: it eliminates some of the transplanting stress that young plants can experience.
However, starting seeds in containers gives you more control over germination conditions and allows you to protect young seedlings from pests or unfavorable weather.
When to Sow Hollyhock Seeds
The best sowing time depends on your climate and the particular variety.
In many temperate climates, seeds can be sown in spring after severe cold has passed or in late summer or early autumn for flowering the following season.
Because many hollyhocks have a biennial growth pattern, don’t assume that a seedling must flower during the same season it is planted.
A plant may spend its first year producing a substantial rosette of leaves.
That is normal.
The plant is building the foundation for its eventual flowering stalk.
Don’t Bury the Seeds Too Deeply
Hollyhock seeds should generally be covered lightly with soil rather than buried deeply.
Sow them in moist, well-prepared soil and cover them with a thin layer of growing medium.
Keep the seedbed reasonably moist while germination occurs.
Once seedlings emerge, provide plenty of light.
Crowded seedlings should eventually be thinned so that stronger plants have enough room to develop.
Thinning can feel wasteful when every seedling looks healthy, but overcrowding later creates weak growth and poor airflow.
Give Young Plants Enough Space
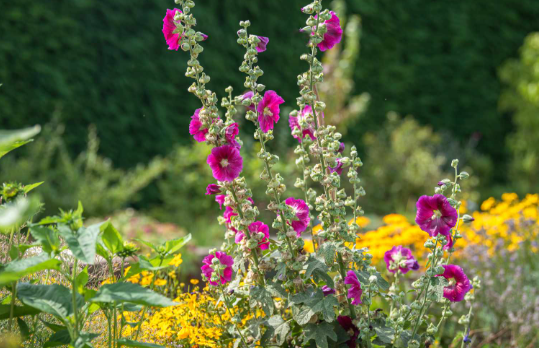
Hollyhocks need room.
The exact spacing depends on the mature variety, but avoid treating them like small bedding annuals.
Crowded plants compete for:
- Sunlight
- Water
- Nutrients
- Air movement
They also create a humid environment around the foliage.
This can encourage leaf diseases.
It is better to have fewer strong hollyhock plants than a dense cluster of weak ones.
Watering Hollyhocks
Young hollyhocks need consistent moisture while establishing their root systems.
Water deeply when the soil begins to dry.
Avoid repeatedly applying tiny amounts of water to the soil surface.
Deep watering encourages roots to explore a larger volume of soil.
Once established, hollyhocks can tolerate short periods of dry weather, but they perform better when severe drought is avoided.
Pay particular attention when plants are producing flower stalks and buds.
Moisture stress during flowering can cause plants to look tired and may reduce the quality of the display.
Avoid Keeping the Leaves Wet
Where fungal disease is a concern, how you water can matter almost as much as how often you water.
Whenever possible, direct water toward the base of the plant rather than spraying the foliage.
Morning watering is preferable to late-evening watering because leaves have more time to dry.
Drip irrigation or a soaker hose can work well in larger flower beds.
Good airflow combined with careful watering creates a less favorable environment for many fungal problems.
Mulching Hollyhocks
A layer of organic mulch can make hollyhock care easier.
Mulch helps maintain more stable soil moisture and suppresses weeds that would otherwise compete with young plants.
Suitable materials include:
- Compost
- Shredded leaves
- Straw
- Fine bark
- Other well-decomposed organic material
Don’t pile mulch directly around the stems.
Leave a small gap so the base of the plant remains relatively dry and well ventilated.
Fertilizing Hollyhocks
Hollyhocks don’t necessarily need heavy fertilizer.
If the soil is fertile and contains organic matter, they can grow successfully with relatively little supplemental feeding.
If growth is weak or soil fertility is poor, a balanced fertilizer can be applied according to the product instructions.
Avoid excessive nitrogen.
High nitrogen levels can produce vigorous leaves and stems without necessarily giving you the flowering performance you want.
A healthy hollyhock needs a balance between vegetative growth and flower production.
If the plant is already producing strong foliage, adding more fertilizer may not solve a flowering problem.
Why Are My Hollyhocks Not Flowering?
There are several possible reasons.
The plant is too young
This is particularly important with biennial types.
A first-year plant may focus almost entirely on leaf growth.
Insufficient sunlight
Hollyhocks need plenty of light to produce strong flowering stalks.
Excessive nitrogen
Too much nitrogen can encourage foliage.
Drought stress
Severe moisture shortages can interfere with flowering.
Poor soil
Extremely poor soil may limit overall growth.
Disease
A severely weakened plant may struggle to produce its normal display.
Before changing everything at once, identify which of these conditions actually applies.
Supporting Tall Hollyhocks
Hollyhocks can become tall enough to require support, especially in exposed gardens.
The most effective approach is to support plants before they begin leaning.
Use:
- Stakes
- Garden ties
- Decorative plant supports
- Fences
- Trellises
- Other sturdy structures
Place stakes carefully so you don’t damage roots.
Tie stems loosely.
A tight tie can restrict the stem as it grows.
If possible, plant hollyhocks in groups or along a structure that naturally reduces wind exposure.
Pruning Hollyhocks
Hollyhocks generally don’t require complicated pruning.
The main pruning tasks are:
- Removing damaged leaves
- Removing diseased foliage
- Deadheading spent flowers
- Cutting back old stems when the plant has finished its cycle
Don’t remove healthy foliage simply because the plant has stopped flowering.
The leaves continue to contribute energy to the plant.
If the variety is perennial or short-lived perennial, healthy foliage may help replenish underground reserves for future growth.
Deadheading for More Flowers
Removing spent flowers can keep hollyhocks looking tidy.
It may also encourage continued flowering in plants capable of producing additional blooms.
Cut or pinch off faded flowers before they develop mature seed capsules if your primary goal is continued flowering.
However, there is a reason to leave some flowers alone.
Hollyhocks can readily produce seed.
If you want the plant to reproduce naturally, allow some flower stalks to mature and produce seeds.
This is one reason hollyhocks can sometimes appear in unexpected places around a garden.
Let Hollyhocks Self-Seed
For a relaxed cottage-garden appearance, self-seeding can be an advantage.
Allowing a few mature seed heads to remain can result in new seedlings appearing around the parent plants.
These young plants may not always be identical to the original variety, particularly if several hollyhocks are growing nearby.
That variation can be part of the fun.
A bed that begins with a few carefully selected colors can eventually contain unexpected combinations.
If you prefer a highly controlled garden design, remove seed heads before seeds mature.
Hollyhock Rust: The Problem to Watch
One of the most recognizable problems affecting hollyhocks is rust.
Hollyhock rust is a fungal disease that can produce small yellowish or orange-brown spots, particularly on the undersides of leaves.
As the disease progresses, foliage can become increasingly damaged.
Severe infections can weaken plants and reduce their appearance.
The best strategy is prevention and early management.
Provide good air circulation.
Avoid overcrowding.
Water at the base of the plants.
Remove severely affected leaves.
Clean up fallen diseased foliage.
Avoid allowing infected plant material to remain around the plants indefinitely.
If rust is a recurring problem, choosing disease-resistant varieties where available can also help.
Why Airflow Is So Important
Hollyhocks have large leaves.
Large leaves can trap humidity around the plant, particularly when plants are crowded.
This creates conditions favorable to fungal diseases.
Good spacing allows wind to move between plants and helps foliage dry after rain or irrigation.
This is one reason that planting fewer plants with adequate spacing can produce a healthier display than filling every available gap.
Garden design and disease management are often the same problem viewed from two different angles.
Hollyhock Pests
Several insects may feed on hollyhocks.
Aphids can gather on young stems and leaves.
Japanese beetles and other leaf-feeding insects may chew foliage in some regions.
The presence of insects doesn’t automatically mean treatment is necessary.
Inspect the plant first.
A small number of insects on an otherwise vigorous hollyhock may have little effect.
Predatory insects and birds can help keep pest populations under control.
Avoid routine broad-spectrum spraying when it isn’t necessary because it can also eliminate beneficial insects.
Hollyhocks and Pollinators
The large, open flowers of hollyhocks are attractive to various pollinating insects.
Bees and other flower visitors may use the blooms for nectar and pollen.
If you want to make the garden more useful to pollinators, grow hollyhocks alongside other flowering plants that bloom at different times.
A garden with a sequence of flowers is generally more valuable to pollinators than one that produces a spectacular display for only a few weeks.
Growing Hollyhocks in Containers
Hollyhocks can be grown in containers, although their height can make container culture more challenging.
Choose a large, heavy pot that won’t easily tip.
Use a well-drained potting mix.
Make sure the container has drainage holes.
Container-grown hollyhocks may require more frequent watering than plants growing in the ground because their soil volume is limited.
Monitor moisture during hot weather.
At the same time, don’t keep the potting mix constantly saturated.
Compact varieties are usually easier to manage in containers than very tall types.
Hollyhocks Through the Seasons
Understanding what the plant is doing at different times of year makes care much easier.
Spring
New growth emerges.
Protect young plants from severe weather and maintain reasonable soil moisture.
This is also a good time to install supports.
Summer
Flower stalks develop and flowering begins.
Water during prolonged dry periods.
Deadhead if desired.
Watch for rust and other leaf problems.
Late summer and autumn
Flowering declines.
Allow some seed heads to mature if you want natural reseeding.
Continue caring for healthy foliage.
Winter
Depending on the variety and climate, the plant may die back or remain as a low rosette.
Avoid excessive winter moisture around the crown.
Can Hollyhocks Survive Winter?
The answer depends on the species, cultivar, and climate.
Many hollyhocks tolerate substantial cold once established.
However, young plants may be more vulnerable than mature ones.
In very cold regions, a moderate layer of mulch can help protect roots from severe temperature fluctuations.
Don’t bury the crown under an enormous mound of wet material.
The goal is insulation, not permanent moisture.
Propagating Hollyhocks
Seed is the easiest method for most home gardeners.
Collect mature seeds from dry seed capsules and store them in a cool, dry location until planting.
Remember that seedlings may vary from the parent plant.
If you’re growing a hybrid and want exactly the same flower characteristics, seed may not produce identical offspring.
Allowing hollyhocks to self-seed can nevertheless be an excellent way to create a naturalized planting over several seasons.
A Practical Hollyhock Care Routine
You don’t need to spend hours maintaining hollyhocks.
A simple routine is enough.
Give them plenty of sunlight.
Plant them in soil that drains well.
Water deeply during establishment and prolonged dry periods.
Avoid excessive nitrogen fertilizer.
Give tall varieties support early.
Keep plants adequately spaced.
Inspect leaves regularly for rust.
Remove badly diseased foliage.
Deadhead if you want a tidier display or additional flowering.
Leave some seed heads if you want the plants to self-seed.
This combination takes care of most of the plant’s important needs.
The Secret to Growing Better Hollyhocks
Hollyhocks are sometimes described as old-fashioned flowers, and that description is appropriate in the best possible way.
They aren’t demanding.
They don’t need complicated irrigation systems or elaborate feeding programs.
They need the basics done well.
Sunlight gives them the energy to build those towering stems.
Well-drained soil keeps their roots healthy.
Adequate moisture allows them to maintain growth.
Good airflow reduces disease pressure.
Support prevents tall stems from being knocked down.
And patience allows the plant to complete its natural life cycle.
Perhaps the most important thing is not to judge a young hollyhock too quickly.
A first-year plant may look like little more than a cluster of leaves.
That doesn’t mean it has failed.
It may simply be preparing.
Underground, roots are developing. The plant is storing resources. Its growth cycle is progressing toward the spectacular flowering stage that will eventually make the wait worthwhile.
Final Thoughts: Let Hollyhocks Grow Tall
Hollyhocks are best appreciated when you allow them to occupy their natural vertical space.
Don’t hide them behind shorter plants.
Don’t squeeze them into a tiny corner.
Give them the back of a border, a sunny fence line, a cottage garden bed, or another location where their height becomes an advantage.
Once established, they can transform an otherwise flat garden into something much more dramatic.
Their flowers rise one after another along tall stems, attracting pollinators and providing color at a height where relatively few garden plants compete.
And while hollyhocks may occasionally suffer from rust or require support, their overall care is surprisingly straightforward.
The formula is simple:
Sunlight + good drainage + sensible watering + airflow + patience.
Get those conditions right, and you don’t need to constantly intervene.
Let the plant grow.
Let it flower.
Let some seed mature if you want it to return naturally.
And when a tall hollyhock is standing in full bloom beside a fence or garden path, you’ll understand why this flower has remained a favorite in cottage and traditional gardens for generations.
The secret isn’t complicated.
Give the hollyhock enough room to become what it was designed to be.