A Practical Guide to Long-Lived Winter and Spring Blooms
Hellebores are unusual garden flowers.
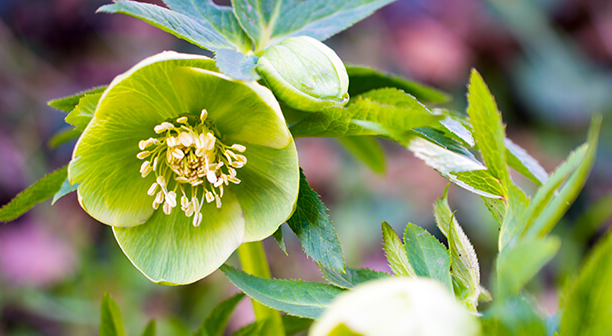
While many perennials wait for warm weather before showing signs of life, hellebores can begin flowering when the garden still looks dormant. Their nodding flowers may appear in late winter or early spring, sometimes pushing through cold weather when little else is blooming.
That unusual flowering season is one of the reasons gardeners value them so highly.
But hellebores are not plants that respond well to being treated like ordinary annual flowers. They are slow to establish, dislike being disturbed once planted, and generally prefer consistent growing conditions rather than constant attention.
Once established, however, they can remain in the same location for many years and gradually become larger, more impressive clumps.
The key to growing good hellebores is therefore less about forcing rapid growth and more about creating a location where the plant can quietly establish its roots.
Here is how to grow and care for hellebores successfully, from choosing the planting site to encouraging healthy flowers year after year.
Also Read: Different Types of Hellebore Flowers
What Makes Hellebores Different?
The name hellebore commonly refers to several species and hybrids in the genus Helleborus. Among the most popular garden types are Lenten roses and Christmas roses, although flowering time varies considerably depending on the species, hybrid, climate, and growing conditions.
Unlike many flowers that produce their best display in summer, hellebores are valued partly because they flower during the colder months.
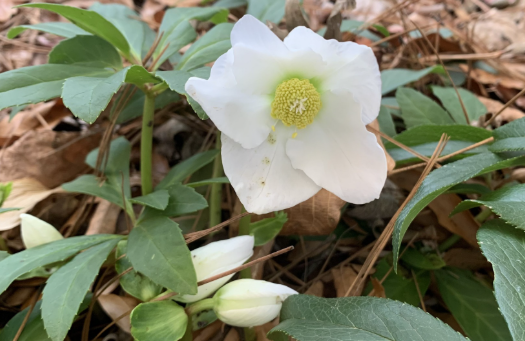
Their flowers can range from white and cream to pink, purple, burgundy, green, and nearly black, with some varieties featuring spots, veins, double flowers, or unusual color combinations.
The flowers are also longer-lasting than their delicate appearance suggests.
What gardeners often call the “petals” are actually sepals. Because sepals are more durable than ordinary petals, hellebore flowers can remain attractive for an extended period.
This gives hellebores an important role in gardens where winter and early spring color is otherwise limited.
Choose the Planting Location Carefully
One of the biggest mistakes you can make with a hellebore is planting it somewhere unsuitable and then trying to compensate later.
Hellebores generally prefer bright shade or partial shade, particularly in areas where summers are hot.
A location beneath deciduous trees can be particularly useful.
During winter and early spring, the bare branches allow sunlight to reach the plants. Once summer arrives, the developing canopy provides protection from intense afternoon sunlight.
This arrangement closely matches the seasonal conditions under which many hellebores perform well.
An east-facing location or a site receiving morning sun and afternoon shade can also work well.
In cooler climates, hellebores can tolerate more sunlight, provided the soil does not become excessively dry.
The important point is to consider both winter and summer conditions when choosing a location.
A spot that looks perfect in March may become excessively hot and dry in July.
Prepare the Soil Before Planting
Hellebores are adaptable, but they perform best in soil that drains well while retaining enough moisture around their roots.
Extremely heavy, waterlogged soil can create serious problems because the roots need oxygen.
At the other extreme, very sandy soil may drain so quickly that plants repeatedly experience drought.
The ideal soil contains plenty of organic matter while remaining structurally open.
Before planting, improve poor soil by incorporating mature compost or another suitable organic material.
Avoid creating a small pocket of exceptionally rich soil surrounded by poor soil.
Instead, improve the broader planting area so roots can gradually expand into consistent conditions.
A good soil structure is often more valuable than simply adding large quantities of fertilizer.
Don’t Plant Hellebores Too Deeply
Planting depth matters.
The crown—the area where the roots and stems meet—should not be buried excessively.
A plant that is buried too deeply may struggle to establish, while an exposed root system can dry out.
When transplanting a nursery-grown hellebore, use the depth at which it was growing in its container as a useful starting point.
Settle the soil around the roots without compacting it excessively.
Then water thoroughly.
After planting, a layer of organic mulch can help stabilize soil moisture and temperature.
Keep the mulch slightly away from the crown rather than piling it directly against the plant.
Give Newly Planted Hellebores Time
This is perhaps the most important lesson for impatient gardeners.
Hellebores are not always fast starters.
A newly planted specimen may spend much of its first season developing roots rather than producing a spectacular display.
That does not necessarily mean something is wrong.
Perennial plants have to establish an underground system before they can consistently support larger amounts of foliage and flowers.
Instead of judging a hellebore by what it does during its first few months, think in terms of several growing seasons.
Once established, a hellebore can become considerably more impressive than it appeared when you first purchased it.
Water Consistently While Plants Establish
Newly planted hellebores require regular moisture while their roots spread into surrounding soil.
Water deeply when the upper soil begins to dry rather than applying tiny amounts every day.
Deep watering encourages roots to explore the surrounding soil.
Once established, many hellebores become relatively tolerant of short periods of dryness, particularly when growing in soil rich in organic matter.
However, drought tolerance does not mean the plant should be allowed to remain severely dry for long periods.
Pay particular attention during hot weather, especially if hellebores are growing beneath trees.
Tree roots can compete aggressively for available water.
Mulching Makes Hellebore Care Easier
A layer of organic mulch provides several benefits.
It can:
- Reduce evaporation
- Moderate soil temperature
- Suppress weeds
- Add organic matter as it decomposes
- Reduce soil erosion
- Protect shallow roots from rapid changes in moisture
Suitable materials include compost, shredded leaves, leaf mold, and fine organic mulch.
Don’t create a thick mound around the crown.
Instead, spread mulch around the plant while leaving a small gap around the base.
Hellebores appreciate moisture stability, but they don’t benefit from constantly wet crowns.
Fertilizing Hellebores: Less Is Often More
Hellebores are not heavy feeders.
If the soil contains reasonable amounts of organic matter, excessive fertilizer is usually unnecessary.
A common mistake is to assume that more nutrients will automatically produce more flowers.
Too much nitrogen can encourage lush foliage without necessarily improving flowering.
If the plant is growing normally and producing healthy leaves and flowers, there may be no reason to intervene.
A light application of a balanced fertilizer or compost around the plant at an appropriate time can support growth when soil fertility is poor.
But think of fertilizer as a supplement rather than the foundation of hellebore care.
Healthy soil structure, appropriate moisture, and suitable light are more important.
When Should You Prune Hellebores?
Hellebores have an unusual pruning requirement because old foliage can overlap with the emerging flowers.
In many situations, removing old, damaged foliage in late winter or early spring makes the flowers easier to see.
It also improves air circulation around the plant.
The timing is important.
Don’t remove healthy foliage simply because the plant looks untidy during its active growing period.
Instead, inspect the plant as new flower stems begin to emerge.
Remove old leaves that are damaged, diseased, or lying across the developing flowers.
Use clean, sharp pruning tools and cut unwanted leaves near their base.
Avoid cutting into emerging flower stems.
Why You Shouldn’t Rush to Remove the Flowers
Hellebore flowers can remain attractive long after they initially open.
As they age, their colors often change.
A white flower may develop green tones, while pink or purple varieties can gradually become deeper or more muted.
This extended transition is part of the plant’s ornamental appeal.
If you immediately remove every flower as soon as it begins to fade, you may miss one of the most interesting stages of the plant’s seasonal display.
Instead, allow the flowers to remain attractive for as long as you like.
If you don’t want seedlings appearing around the parent plant, remove the flower heads before mature seeds are dispersed.
Should You Deadhead Hellebores?
The answer depends on your goal.
If you want to prevent self-seeding, remove spent flowers before they release mature seed.
If you enjoy naturalizing plants and don’t mind young seedlings appearing nearby, you can leave the flowers in place.
However, seedlings may not necessarily resemble the parent plant exactly.
This is particularly interesting in gardens containing several hellebore varieties because cross-pollination can produce unexpected flower colors and forms.
For gardeners who enjoy experimentation, allowing some flowers to produce seed can be surprisingly rewarding.
Growing Hellebores in Containers
Hellebores can be grown in containers, but the container must provide adequate drainage and enough room for root development.
Choose a pot with drainage holes and use a high-quality, well-drained potting medium.
Container plants dry out faster than plants growing in the ground.
Consequently, monitor moisture more closely during warm weather.
At the same time, don’t allow the container to remain waterlogged.
The combination of adequate moisture and drainage is much more important than frequent fertilization.
A containerized hellebore can make an excellent focal plant near an entrance, shaded patio, or partially sheltered garden area.
Common Hellebore Problems
Hellebores are generally resilient, but several problems can occur.
Black or damaged foliage
Old leaves may become discolored, damaged, or affected by fungal problems.
Removing affected foliage can improve the plant’s appearance and reduce the amount of diseased material remaining around it.
Avoid leaving heavily infected leaves lying around the base of the plant.
Aphids
Aphids may occasionally gather around young stems and developing growth.
Before reaching for insecticide, inspect the plant carefully.
Lady beetles, lacewings, hoverflies, and other beneficial organisms may already be controlling the infestation.
A small aphid population does not necessarily justify intervention.
Slugs and snails
Slugs and snails can damage young foliage, particularly in damp, heavily mulched gardens.
Inspect plants regularly, especially during wet periods.
Keeping the area around the plant reasonably open and avoiding excessive organic debris can make the environment less attractive to these pests.
Root problems
Poor drainage is one of the more serious concerns.
If the soil remains saturated for prolonged periods, roots can become stressed or damaged.
This is why improving drainage before planting is much easier than trying to correct the problem later.
Propagating Hellebores
Hellebores can be propagated from seed or by division, depending on the type.
Growing from seed is relatively easy in principle, but patience is required.
Seeds generally need appropriate environmental conditions before germination, and young plants take time to reach flowering size.
This makes seed propagation better suited to gardeners who enjoy the process rather than those looking for immediate results.
Division can produce larger plants more quickly, but hellebores generally dislike unnecessary root disturbance.
If dividing an established plant, work carefully and replant divisions promptly.
For many gardeners, purchasing a healthy established plant is simpler.
Let Hellebores Naturalize
One of the most attractive ways to use hellebores is to allow them to form informal colonies beneath trees and shrubs.
Instead of planting a single specimen in the middle of an open bed, place several plants together.
Over time, seedlings can appear around established plants.
The resulting group looks far more natural than a perfectly symmetrical arrangement.
Hellebores combine particularly well with shade-loving plants such as ferns, hostas, heucheras, epimediums, and spring bulbs.
Their flowers provide seasonal interest while their foliage can contribute structure after flowering ends.
Hellebores and Wildlife
Although hellebores are not primarily grown as pollinator plants, their early flowers can provide an important food source for insects active during cooler periods.
Their timing is particularly useful because relatively few ornamental plants are flowering during late winter and early spring.
This makes them valuable components of a garden designed to provide year-round ecological interest.
However, hellebores should be handled with care.
All parts of hellebores are considered poisonous if eaten.
Keep this in mind if young children or pets have access to the garden, and wear gloves when handling the plants if your skin is sensitive.
Why Hellebores Are Worth the Patience
The real advantage of hellebores isn’t that they grow quickly.
It is almost the opposite.
They are plants you establish today and increasingly appreciate as the years pass.
A young hellebore may initially look modest. Several seasons later, it can become a substantial clump producing numerous flower stems when most of the garden is still waiting for spring.
That makes hellebores particularly useful for gardeners who prefer long-term planting rather than constantly replacing annual flowers.
Once the right location has been found, the best strategy is often to leave the plant alone and allow it to establish.
The Hellebore Care Routine
If you want a simple maintenance routine, focus on these fundamentals:
Plant in suitable light.
Choose partial shade or bright filtered light, particularly where summers are hot.
Improve the soil before planting.
Aim for fertile, organic-rich soil that drains well but does not dry excessively fast.
Water during establishment.
Keep newly planted hellebores reasonably moist while their roots develop.
Mulch annually.
Use organic matter to stabilize soil moisture and gradually improve soil structure.
Prune old foliage at the right time.
Remove damaged or diseased leaves and clear old foliage when new growth and flowers emerge.
Don’t overfeed.
Hellebores generally don’t require aggressive fertilization.
Avoid unnecessary disturbance.
Established plants often perform best when allowed to remain in the same location.
Watch for pests and disease.
Early observation is usually more useful than routine pesticide application.
The Secret to Successful Hellebores Is Patience
Hellebores aren’t instant-gratification plants.
They don’t necessarily reward you with spectacular growth immediately after planting. They don’t need constant fertilizer, daily watering, or regular transplanting.
Instead, they reward gardeners who get the fundamentals right and then allow the plant to establish.
Give a hellebore the right amount of light, well-drained organic-rich soil, reasonable moisture, and room to develop, and it can become one of the most dependable plants in the garden.
Its greatest contribution may come at a time when the garden needs it most.
When summer annuals have disappeared and many perennials have gone dormant, hellebores can begin their display during the colder months, bringing flowers and structure into an otherwise quiet landscape.
That is what makes them more than simply another flowering perennial.
They are a long-term investment in the garden—one that becomes more valuable with time.
And once you understand that hellebores are plants to establish rather than constantly manage, caring for them becomes remarkably simple.