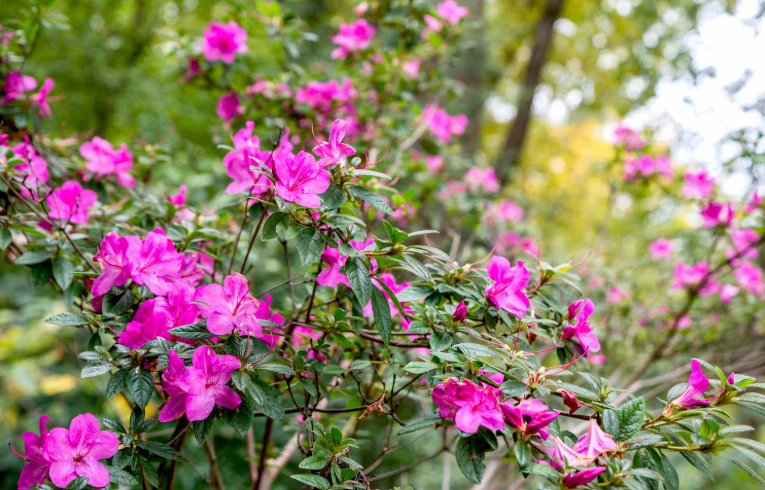
Azaleas are flowering shrubs belonging to the genus Rhododendron, a member of the heath family Ericaceae. They are among the most celebrated ornamental plants in the world, prized for their spectacular spring blooms that arrive in dense clusters of funnel-shaped flowers. With over 10,000 named cultivars developed from roughly 800 wild species, azaleas come in an extraordinary range of colors, from pure white and pale blush to vivid coral, magenta, and deep purple.
Native to several continents, azaleas are broadly divided into two main groups — deciduous and evergreen. Deciduous azaleas, largely native to North America and Europe, shed their leaves each autumn and tend to produce larger, more fragrant flowers. Evergreen azaleas, predominantly from Asia, retain their foliage year-round and are the types most commonly seen in formal gardens and landscaped hedges across the American South and Pacific Northwest.
Azaleas hold deep cultural significance in several parts of the world. In Japan, the tsutsuji festival celebrates the blooming of wild azaleas each spring, and the plant appears frequently in classical Japanese art and poetry. In the United States, the Azalea Trail in Mobile, Alabama and the annual Washington DC Azalea Festival draw thousands of visitors each year. South Korea and Nepal both recognize azalea species as national symbols.
In terms of size and form, azaleas range from compact dwarf varieties under 1 foot tall to large landscape shrubs reaching 8 to 10 feet in height. Most cultivated varieties used in home gardens fall in the 3 to 5 foot range, making them versatile for borders, foundation plantings, and woodland gardens. Many reblooming cultivars have been developed in recent decades that produce a second flush of color in late summer or early autumn.
Azaleas are acid-loving plants that thrive in well-drained, humus-rich soils with a pH between 4.5 and 6.0. They are shallow-rooted, with most of their feeding roots concentrated in the top 12 inches of soil. This characteristic makes them sensitive to soil compaction and drought. They grow best in climates with moderate humidity and are generally hardy across USDA zones 5 through 9, depending on the cultivar.
While azaleas are beloved in the garden, it is important to note that all parts of the plant are toxic if ingested by humans, dogs, cats, and livestock. The toxins, called grayanotoxins, can cause nausea, vomiting, low blood pressure, and irregular heartbeat. Despite this, azaleas remain one of the best-selling ornamental shrubs in the world, and when sited correctly with the right soil and light conditions, they are relatively low-maintenance plants that reward gardeners with years of spectacular seasonal color.
Planting Instructions for Azaleas
1. Choose the right time to plant. The best time to plant azaleas is in spring or early autumn, when temperatures are mild and the soil is workable. Planting during these seasons gives the roots time to establish before the stress of summer heat or winter cold. Avoid planting in midsummer or when the ground is frozen, as transplant stress during extreme temperatures can set back or kill newly planted shrubs.
2. Select an appropriate site with the right light. Azaleas perform best in dappled or partial shade, ideally receiving two to four hours of morning sun followed by afternoon shade. In hot climates, full afternoon sun can scorch the foliage and fade the flowers prematurely. In cooler regions, they can tolerate more sun. Under deep, dense shade, flowering will be sparse and growth weak, so a bright, filtered light environment is ideal.
3. Test and amend the soil pH before planting. Azaleas require acidic soil with a pH of 4.5 to 6.0. Before planting, test your soil using an inexpensive soil test kit available at garden centers. If the pH is too high, lower it by incorporating elemental sulfur or acidifying fertilizer into the planting area several weeks in advance. Never plant azaleas in alkaline or heavy clay soils without first amending them, as nutrient lockout and root rot will follow.
4. Ensure excellent soil drainage. Azaleas are highly susceptible to root rot caused by Phytophthora fungi, which thrive in waterlogged conditions. Before planting, check that your chosen site drains freely after heavy rain. If drainage is poor, either build a raised bed at least 12 inches above the natural grade, or amend the soil deeply with coarse sand and organic matter to break up compaction and improve percolation.
5. Enrich the soil with organic matter. Work a generous amount of organic matter — such as pine bark fines, aged compost, or well-rotted leaf mold — into the planting area to a depth of at least 12 inches. Organic matter improves drainage in clay soils, increases moisture retention in sandy soils, and lowers pH gradually over time. Pine bark is particularly favored for azaleas because it acidifies the soil and mirrors the forest floor conditions these plants naturally prefer.
6. Dig the planting hole to the correct dimensions. Dig a hole that is two to three times as wide as the root ball but only as deep as the height of the root ball itself. Azaleas should never be planted too deeply — placing the root crown below the soil surface is one of the most common mistakes and leads to decline or death. A wider-than-deep hole encourages lateral root spread, which is critical for these shallow-rooted shrubs.
7. Position the plant at the right height. Set the azalea in the hole so that the top of the root ball sits slightly above the surrounding soil grade, about 1 to 2 inches higher. This elevated planting compensates for soil settling after watering and ensures the crown does not become buried over time. If you can see the topmost roots just at or slightly above the soil surface, the planting depth is correct.
8. Backfill carefully with amended native soil. After positioning the plant, backfill the hole using a mix of your native soil and the organic amendments you prepared. Avoid using pure compost or peat as the sole backfill material, as this can create a moisture barrier between the amended pocket and the surrounding soil. Firm the soil gently as you fill to eliminate large air pockets, but do not compact it heavily.
9. Water thoroughly at the time of planting. Immediately after planting, water the root ball and surrounding soil slowly and deeply to settle the soil and eliminate air pockets. Use enough water that the entire root zone is saturated, not just the surface. A slow trickle from a hose left at the base of the plant for 20 to 30 minutes is more effective than a fast, shallow watering. This first watering is critical for initiating root-to-soil contact.
10. Apply a generous layer of mulch. After planting and watering, apply 2 to 3 inches of organic mulch — pine straw, shredded pine bark, or wood chips — over the root zone, extending out to the drip line of the shrub. Mulch moderates soil temperature, retains moisture, suppresses weeds, and gradually lowers soil pH as it decomposes. Keep the mulch a few inches away from the main stem to prevent moisture buildup against the bark, which can promote crown rot.
11. Space plants correctly for good air circulation. When planting multiple azaleas, space them according to the expected mature spread of the variety, typically 3 to 6 feet apart for average cultivars and up to 8 to 10 feet for large-growing types. Crowding reduces air circulation and creates humid microenvironments that encourage fungal diseases such as petal blight and leaf spot. Proper spacing also allows each plant to develop its natural form without competition.
12. Avoid planting near concrete structures or lime-heavy materials. Concrete foundations, sidewalks, and driveways leach lime into the surrounding soil over time, raising the pH and creating alkaline pockets that are hostile to azaleas. If you must plant near concrete, install a root barrier or line the planting area with a permeable barrier to slow lime migration, and monitor pH annually.
13. Water consistently during the establishment period. For the first one to two growing seasons after planting, azaleas require consistent moisture to establish a strong root system. Water deeply once or twice per week in the absence of rain, adjusting for heat and drought. Do not rely on rainfall alone, especially during summer. Signs of water stress include wilting in the morning hours and leaf curl — act quickly, as azaleas can decline rapidly under drought pressure.
14. Fertilize cautiously after establishment. Do not fertilize at the time of planting, as salts in fertilizer can burn tender new roots. Wait until new growth emerges and the plant shows signs of establishment, typically 6 to 8 weeks after planting. Use a slow-release, acid-forming fertilizer formulated for azaleas and rhododendrons, following label directions carefully. Avoid high-nitrogen fertilizers late in the season, as these push soft growth that is vulnerable to frost damage.
15. Protect newly planted azaleas from wind and frost. In their first winter, newly planted azaleas are more vulnerable to desiccating winds and hard freezes than established plants. In exposed sites, erect a simple burlap windbreak on the north and west sides of the plant, or wrap loosely with frost cloth during cold snaps. Avoid wrapping so tightly that air circulation is eliminated. Remove all protection in early spring as temperatures moderate to prevent overheating and fungal problems.